63+ Row Boat Plans


 fity.club
 Opening: A Journey to a DIY Row Boat Ready to embark on a rewarding project? Building your own row boat is a fantastic way to connect with the water, learn new skills, and create something truly unique. This step-by-step guide will walk you through the process, from gathering materials to launching your beautiful, handcrafted vessel. While this guide provides a general overview, always consult detailed boat plans and adapt the process to your specific chosen design and skill level. Remember safety first!
Step 1: Selecting Your Plans and Gathering Materials The foundation of any successful boat build is a solid set of plans. Search online or consult boating resources for row boat plans that suit your desired size, style, and construction method (e.g., stitch-and-glue, plywood lapstrake). Once you have your plans, create a comprehensive materials list. Common materials include: Marine-grade plywood (thickness varies depending on the plans) Epoxy resin and hardener Fiberglass cloth Wood for framing (e.g., fir, pine, or mahogany) Fasteners (screws, nails, or staples as specified in the plans) Paint or varnish for finishing Oars and oarlocks Safety gear (life jackets, etc.) Make sure you have all the necessary tools: Saw (circular saw, jigsaw, or hand saw) Drill and drill bits Sander Clamps Measuring tape Pencils and markers Mixing containers and sticks for epoxy Brushes and rollers for applying resin and paint Safety glasses and gloves
Step 2: Cutting and Preparing the Plywood Carefully transfer the shapes from your plans onto the plywood sheets. Precision is crucial for a well-built boat. Use a saw to cut out the hull panels, transom, and other components according to the marked lines. Sand the edges of the cut pieces to remove any splinters or burrs. If using the stitch-and-glue method, drill small holes along the edges of the panels as indicated in the plans. These holes will be used for temporary wire stitching.
Step 3: Assembling the Hull (Stitch-and-Glue Method Example) If you've chosen the stitch-and-glue method, align the hull panels and temporarily "stitch" them together using copper wire or plastic zip ties through the pre-drilled holes. This creates the basic shape of the boat. Make sure the panels align correctly and that the hull is symmetrical. Once satisfied with the alignment, begin applying epoxy fillets to the interior seams where the panels meet. These fillets provide strength and a watertight seal. After the epoxy fillets have cured, remove the temporary stitching.
Step 4: Adding Frames and Reinforcements Cut and install the frames (ribs) according to your plans. These frames provide structural support and help maintain the shape of the hull. Secure the frames to the hull using epoxy and fasteners. Add any other reinforcements specified in the plans, such as stringers (longitudinal strips of wood that run along the length of the hull).
Step 5: Fiberglassing and Epoxy Coating Apply fiberglass cloth to the exterior of the hull, saturating it with epoxy resin. This provides a strong, watertight, and durable outer layer. Follow the manufacturer's instructions for mixing and applying the epoxy. Pay close attention to avoiding air bubbles and ensuring the cloth is fully wetted out. Once the epoxy has cured, sand the surface smooth and apply additional coats of epoxy as needed to achieve a fair and even finish.
Step 6: Finishing and Painting Sand the entire boat thoroughly, working your way up through progressively finer grits of sandpaper. This creates a smooth surface for painting or varnishing. Apply several coats of marine-grade paint or varnish, following the manufacturer's instructions. Be sure to allow each coat to dry completely before applying the next. Install oarlocks and seats.
Step 7: Launching Your Row Boat Before launching your new row boat, inspect it carefully for any leaks or imperfections. Ensure that the oarlocks are securely mounted and that you have all the necessary safety equipment. Launch your boat in a calm body of water and enjoy the fruits of your labor! Be aware of weather conditions and always wear a life jacket.
Conclusion: A Labor of Love, A Vessel of Pride Building a row boat is a challenging but incredibly rewarding experience. You've not only gained valuable skills but also created a beautiful and functional craft that you can enjoy for years to come. Remember to maintain your boat properly to ensure its longevity and safety. Happy rowing!
Using Columns And Rows Handsontable 12.2.0: More Flexibility In Adding
fity.club The Best Row Exercises To Build Back Strength And Size
 www.gymshark.com
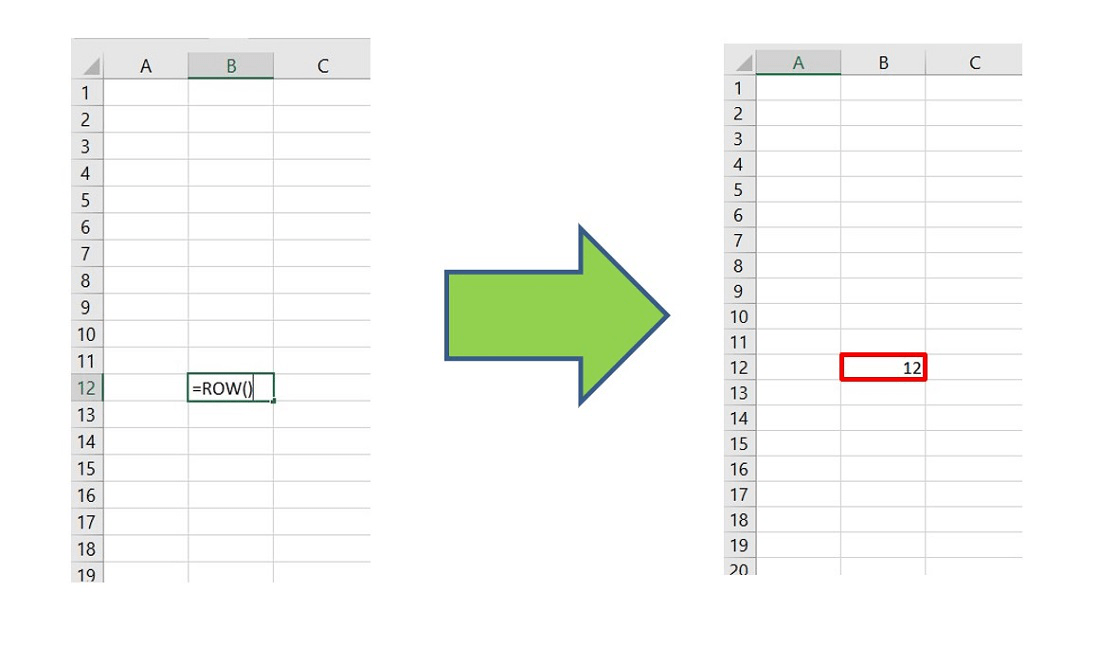
 Что такое функция Row в Excel
 wordexceler.ru
63+ Row Boat Plans
![63+ Row Boat Plans]() Reviewed by dhegg
on
October 03, 2025
Rating:
Reviewed by dhegg
on
October 03, 2025
Rating:

No comments: